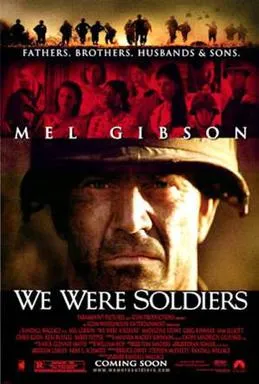
Historical accuracy of We Were Soldiers

Historical accuracy of We Were Soldiers

Characters
Lt. Col. Hal Moore
Based on the real Hal Moore. Mel Gibson's portrayal captures his leadership, strategic thinking, and commitment to his men during the Battle of Ia Drang, generally aligning with Moore's own account and reputation.
Sgt. Maj. Basil L. Plumley
Based on the real Basil Plumley. Sam Elliott captures his famously gruff, no-nonsense demeanor and combat experience. Some details about his prior service record have been disputed historically, but not central to the film's portrayal.
Joseph L. "Joe" Galloway
Based on the real Joe Galloway, a journalist who was present at LZ X-Ray and participated in the fighting. Barry Pepper's portrayal reflects Galloway's experiences as described in the book.
Julie Moore
Based on the real Julie Moore. Madeleine Stowe portrays her role leading the wives at Fort Benning and dealing with the delivery of death notifications, reflecting the realities faced on the home front.
2nd Lt. Jack Geoghegan
Based on the real 2nd Lt. John "Jack" Geoghegan, a devout family man and platoon leader killed in action at LZ X-Ray.
Capt. Tom Metsker
Based on the real Capt. Thomas Metsker, commander of Alpha Company, 1/7 Cav, who was killed in action during the battle.
More characters
Capt. Tony Nadal
Based on the real Capt. Ramon "Tony" Nadal, commander of Alpha Company, 2/7 Cav (though depicted commanding Moore's company in film), who fought bravely at LZ X-Ray.
Maj. Bruce P. Crandall
Based on the real Maj. Bruce Crandall, a Huey pilot awarded the Medal of Honor for his actions flying into LZ X-Ray under heavy fire to evacuate wounded and bring supplies. Played by Greg Kinnear.
Capt. Ed W. Freeman
Based on the real Capt. Ed "Too Tall" Freeman, Crandall's wingman, also awarded the Medal of Honor for his bravery flying support missions into LZ X-Ray.
Lt. Col. Nguyễn Hữu An
Based on the real PAVN (North Vietnamese Army) commander whose forces engaged Moore's battalion at LZ X-Ray. The film attempts to portray his perspective, drawing from the source book.
Sgt. Ernie Savage
Based on the real Sgt. Ernie Savage, whose platoon was cut off from the main battalion perimeter during the first day of fighting and held out overnight.
2nd Lt. Henry Herrick
Based on the real 2nd Lt. Henry Herrick, who led his platoon aggressively forward and was quickly cut off and killed early in the battle.
Spec. Galen Bungum
Represents photographers present and radio operators, likely a composite figure based on real soldiers fulfilling these roles.
Jimmy Nakayama
Based on the real Spec. 4 James Nakayama, who was mortally wounded by friendly fire (napalm) during the "Broken Arrow" incident.
Story
Deployment of 1st Cavalry (Airmobile) to Vietnam
Accurately depicts the arrival of the 1st Cavalry Division, testing its new airmobile helicopter tactics, in Vietnam in 1965.
Battle at Landing Zone X-Ray (Nov 14-16, 1965)
The core narrative accurately follows the events of the intense three-day battle at LZ X-Ray as detailed in Moore and Galloway's book.
US forces significantly outnumbered
Moore's battalion of around 400 men faced elements of PAVN regiments totaling roughly 2,000-4,000 soldiers, accurately reflecting the odds.
Nature of combat (close quarters, heavy fire)
Widely praised for its realistic portrayal of the chaotic, brutal, and close-range fighting that occurred at LZ X-Ray.
Crucial role of helicopter support (Crandall/Freeman)
Accurately highlights the vital role of Huey helicopters, flown under intense fire by pilots like Crandall and Freeman, for troop insertion, resupply, and medical evacuation (medevac).
Broken Arrow incident
The critical moment where Moore declared "Broken Arrow" (meaning an American unit is being overrun), calling in all available air support dangerously close to US lines, is accurately depicted.
Friendly fire napalm strike
A tragic incident where napalm was accidentally dropped on US positions, causing American casualties (including Jimmy Nakayama), occurred and is accurately shown.
Journalist Joe Galloway participating in combat
Galloway, though a civilian reporter, did take up arms during the battle and helped rescue wounded soldiers, later receiving a Bronze Star with V device for his actions.
The "Lost Platoon" ordeal
Accurately depicts Lt. Herrick's platoon being cut off early in the battle, and Sgt. Savage taking command after Herrick's death, holding out against repeated attacks until relieved (though relief details differ slightly from film).
Moore's leadership and presence on the frontline
Reflects Moore's documented leadership style: leading from the front, staying with his men, and his determination to "leave no man behind."
Final bayonet charge led by Moore
This climactic charge is a fictional invention for the movie. While Moore did order bayonets fixed for a final sweep after the main fighting ended, there was no charge against enemy forces like the one depicted.
Ambush at LZ Albany mostly omitted
The film focuses almost exclusively on LZ X-Ray and barely mentions the subsequent, equally brutal ambush of the 2nd Battalion, 7th Cavalry marching to LZ Albany, where US casualties were even higher.
Wives delivering death notices via taxi
This accurately reflects an initial breakdown in the Army's notification system during Ia Drang. Julie Moore confirmed taxi drivers delivered some telegrams initially, prompting changes. The film dramatizes her specific role.
Inclusion of PAVN perspective
The film attempts to show the viewpoint and resolve of the North Vietnamese commander and soldiers, based on the book, offering more balance than many earlier Vietnam films, though necessarily limited in scope.
Setting
Ia Drang Valley, Central Highlands, Vietnam (1965)
Filmed primarily at Fort Hunter Liggett and Fort Benning, the locations effectively replicated the terrain (dry grass, sparse trees, hills) of the Ia Drang Valley where the battle took place.
US Army uniforms and equipment (1965)
Highly accurate depiction of early-war US Army gear: OG-107 utility uniforms, M1 helmets, M16 rifles (first major battle use), M60 machine guns, M79 grenade launchers, early web gear.
PAVN uniforms and equipment
Accurately shows typical North Vietnamese Army equipment for the period, including khaki uniforms, pith helmets, AK-47 rifles, SKS carbines, and RPGs. The use of an MG34 by PAVN is historically plausible.
UH-1 Huey Helicopter operations
Accurately showcases the central role of the Huey helicopter in the airmobile tactics used at Ia Drang for troop transport, supply, fire support coordination, and medical evacuation.
Nature of Airmobile Warfare
Effectively portrays the concept and execution of airmobile infantry tactics being tested on a large scale for the first time in this battle.
Combat conditions (heat, dust, close range)
Realistically conveys the chaotic, visceral nature of jungle/highland combat, including the heat, dust, noise, confusion, and extremely close fighting distances ("grabbing the belt buckle").
Fort Benning, Georgia (Training/Home Base)
Scenes depicting training, family life, and departure from Fort Benning accurately represent the home base of the 1st Cavalry Division before deployment.
